(NOTE:
– Expect a post somewhat technical. Please, if you’re not interested on game development you could just skip/miss it)
– As this post doesn’t pretend to be a neither tutorial nor a paper, it’s is very summarized. If I had to write a novel every time I write a post, then I’ll had no time to develop the game :\ apologies! )
This week I started studying the workflow for my new project Maria Akane, if I had to develop de game using Unity.
In my previous projects I’ve been using my own Engine “FuetEngine” and all their tools. So the task is guessing the tools which will substitute the FuetEngine ones, starting by the ones which I’ll use to do animations.
This will test the viability of setting up and animating the 2D characters using Blender. Note I’m not a Blender expert. Hopefully some of the problems I found can be solved by someone else.
For skeletal cut-out animation, the setup is really tedious. For every part of the body, we have to create its quad, and give the exact size in pixels (or something proportional) manually.
We create a group (Empty object where it will be parented) which will allow us to put several sprites linked to a bone.
For every sprite, we have to create a new empty object to setup the pivot or rotation / scale point for this sprite.
For every sprite, we have to create a new material, and for every material a texture. We have to setup properly the material and texture parameters to handle correctly alpha, diffuse and removing specular.
We have also to perform an unwrap, and set the proper texture for every element.
You can try to place the sprites in its exact position, to check everything is being done properly, but this we’ll later lose this setup.
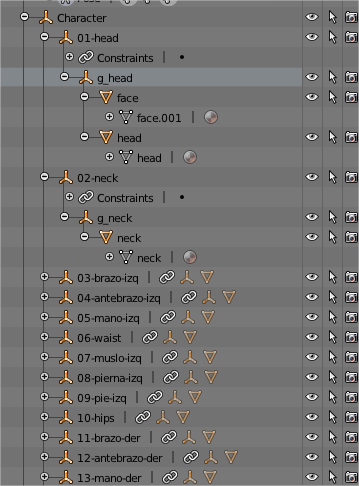
Once we have all the parts setup, it’s time to setup the armature. We setup it by hand, placing the bone tips, tails or heads in its proper place.
For every parent object (parent empty object of all the object of a body part, for instance the head), we have to add a constraint modifier of type ChildOf. Its target will be the armature and we’ll have to setup the proper linked bone (for instance the head bone).
Most probably, we’ll lose the position and orientation setup in previous steps. We reset the position to 0, and we setup the orientation manually. If it looks good, then it’s ok. We’ll have to rely on this.
This will be the the approximate result, although in this case, all the bones have the armature as parent, and this is not the most appropriate result, if we want to associate this to a humanoid avatar in Unity.
We need to take special care with the names of the materials. When we import the mesh in Unity, the materials will be created automatically if there exists a folder called Textures in the same folder of the .blend file, and all the textures our model uses need to be there in order to make the import process work properly.
In the other hand, we’ll have to edit all the materials one by one, because:
– By default they are diffuse and we need them to be transparent->Diffuse
– Because their intensity it’s not 100% and then they look grayish, even if you setup the intensity to 100% in Blender.
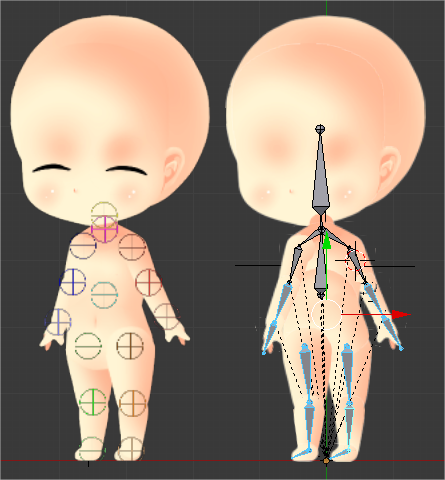
– At this moment we can animate our character from Blender using bones. Please note, there is no need of bones to make an animation of this kind, as we can directly make a hierarchy using all the parts already defined, for instance: arm is parent of the fore arm, which is parent of the hand, etc…
The use of bones is more necessary if we want to use rigging and skinning which can be done with this setup.
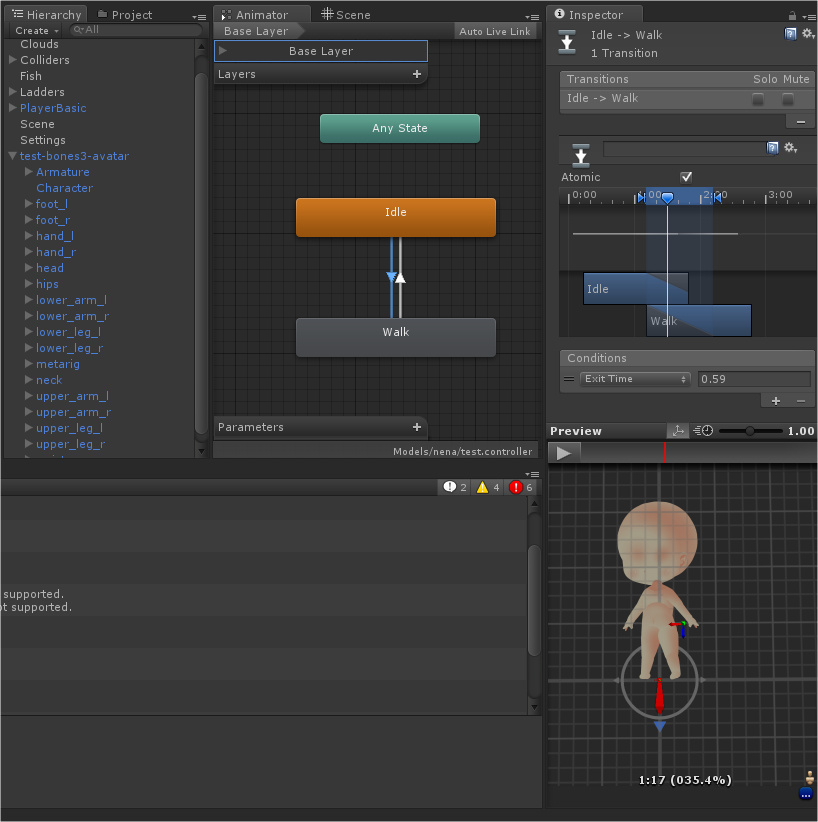
With the animations ready, we can go to Unity and take profit of the tools and features for conventional animations. Specifically, we can use Mecanim, use the Unity event system in combination with our animations, use blend trees, animation blending between Mecanim states, and everyhing else.
After many attempts to achieve a humanoid avatar bone structure in Unity, I desist and opt for the “generic animation” system, as Mecanim and its main features work.
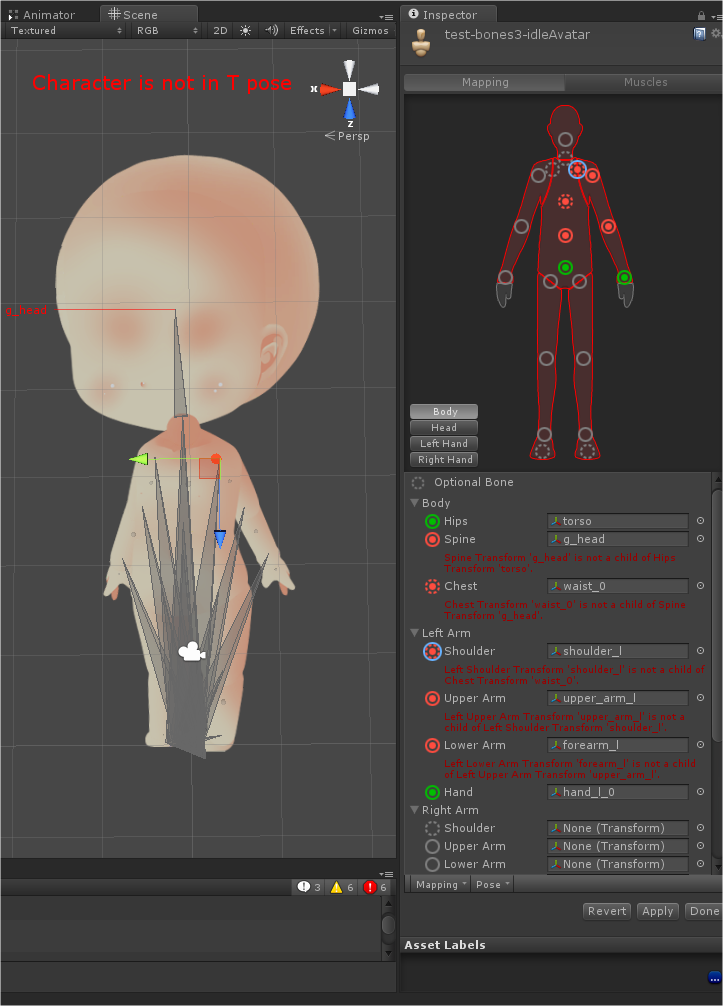
It would be great if after creating a humanoid avatar it’s possible to take profit of other animation sources, but I’m not 100% sure if this is possible. So we’ll have to create our own animations from scratch.